Step Up Your Gunpla is a new series of tutorials that Gunpla 101 contributor Nanochi has designed for builders who want to bring more pizazz to their kits. While these steps are shown on non-painted kits of the High Grade series, these same steps can be used on painted kits as well as Master Grade kits.
Have you ever painted your Gunpla or put on decals and notice later on that the paint/decals seems to be coming off the parts, or even a white substance having shown up on the parts?
This is due to a “mold release” that is on each plastic part of Gunpla models. While it’s initially helpful, it can cause issues with making paint or stickers stick later on.
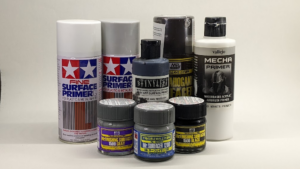
Every time a Gunpla is made at Bandai’s factory, there is a mold release put on the runners that helps the parts form. It also makes it easier to release the plastic from the molds without them getting stuck. This can be a good thing: it makes Gunpla parts last longer, and it reduces imperfections that might occur inside the mold. However, it also makes it hard to paint parts, even with primer. Luckily the mold release can be cleaned pretty easily.
In this tutorial, I’ll show you a simple and effective way of cleaning your kits.
You will need to have a large bowl of warm water (straight from your sink will work), and liquid dish detergent. Mix the water and a teaspoon of soap in a bowl until it is evenly distributed.
Next either put your cut parts into the water or, if you haven’t cut the parts out yet, submerge the runners in the water. If you are using the runner option, it is best to do one runner at a time.
 Let the parts soak for 5-20 minutes, stirring the water every now and then. Using gloves, remove the parts from the water and let them air dry for 24 hours. If you are doing this via runners, you can tie a string to the end of the runner and hang it in the air.
It is important that you use gloves to handle the parts from this point forward as oil from your fingertips can also get onto the parts which can cause similar issues as the mold release.
After drying, your parts are ready for priming and assembly.
An alternative method if you are looking for a more clean result has similar methods, but you will need a degreaser like Simple Green or Purple Power as well as a basic toothbrush.
Note that if using this method, you will need gloves as degreaser can harm the skin from prolonged exposure. This step is required if you are handling resin parts.
First, dip your parts into degreaser for about 5 minutes. Afterwards, lightly scrub the parts with the brush while the parts are still soaking. Wash the parts off with hot water only and hang to dry for 24 hours. While this method removes more mold release in a much shorter time, some parts may require 2-3 soakings to do so.
Take your newly cleaned and dried parts and apply stickers, decals, or paint primer as desired. You’ll notice that not only does it stick better now, but it will remain there far into the future, too.
Last but not least, don’t forget to add a top coat to your model when you’re done building. You spent a lot of time getting your Gunpla parts sparkling clean, so don’t forget to seal them with a top coat at the end so they stay that way!