
Here at Gunpla 101, we’ve already shared the basics on primer in Gunpla Primer 101. But just how necessary is the primer step for hobby painting? In this tutorial, Megaplamo gives you 6 good reasons to never skip it—and has the pics of perfectly primed parts to prove it.
Have you ever wondered why experienced Gunpla builders are always recommending that you prime before you paint? It may seem like an unnecessary and tedious step, but it actually can have an enormous effect on your final results. In this article, I’m going to convince you that you should never skip the primer step again!
But first, let’s discuss some primer basics. Consider this your “primer primer.”
Primer comes in just as many forms as regular paint, but we will focus on the two main types that are most commonly available:
Solvent-based, like Tamiya, Mr Surfacer, and Alclad, and
Water-based, like Vallejo, Badger Stynylrez, and Ammo by MIG.
You can usually find both types available in bottles and spray cans.
What’s the difference? Solvent-based primers “bite” into the plastic, meanwhile, water-based primers sit on top of the plastic. Solvent-based primers can be sanded down and most water-based primers cannot, with the exception of Badger Stynylrez. In most cases, I recommend that you use a sandable primer. In addition to this, some primers are also surfacers that have a texture built into them to help fill imperfections in the plastic.
Mr Surfacer comes in 500, 1000, 1200 and 1500 versions. Each number represents the fineness of the finish and its ability to fill imperfections. If you were to use Mr Surfacer 500, you would have the highest filling quality and the finish would look as if you sanded it with a 500-grit piece of sandpaper, perfect for filling large imperfections. If you used Mr Surfacer 1500 the finish will look as if you sanded the model with 1500 grit sandpaper, but it will only fill small scratches—better if you want your finished kit to look like an off-the-assembly-line mech.
Tamiya is available in surface primer and fine surface primer; these are roughly similar to 1000 and 1500 versions respectively.
Don’t have Mr Surfacer or Tamiya on hand? You can also spray regular lacquer paint directly onto the plastic and use it as a primer. However, keep in mind that this approach means it won’t have any filling quality at all, so the model’s imperfections will not be concealed.
You can apply most primer by spray or brush. Use light wet coats and plenty of thinner. If you apply it too dry, it will come out more grainy and textured. This is fine as long as it’s what you want. Mr Surfacer 500 is too rough of a texture to be airbrushed, so be sure to apply it with a brush. You also have the option of spray can primer, which is a great time saver for most people, but for someone like me who lives in a city that is humid three-quarters of the year, it’s easier to use airbrush primers in my spray booth.
For this tutorial I am working with the Entry Grade RX-93 Nu Gundam.
Got it? Good. Without further ado, here are the top 6 things that primer can do for you!
1. Help with the sanding process
When working with bare plastic, it is sometimes difficult to see a nub mark or seam line, or to check if the putty is level. By spraying a primer on top, small imperfections are filled and large imperfections are made more visible. Once you can see them, you can simply sand or putty the area and then reapply primer to the part.
See also: How to use Silly Putty for masking and painting Gunpla

Here is an example of an imperfection in the mold. Primer will be perfect for this! (PS: Don’t forget to dust the part before painting.)

Here is the same part as before with a layer of Mr Color 1500 Black. I mixed it 50/50 with Mr Leveling thinner before spraying it through the airbrush.

Here is a part that I over-sanded. You can see that the surface is corrected with the 1000-grit surfacer.

Here is a nub mark that I couldn’t see until I sprayed primer.
2. Fill gaps and seams
One of the most useful things you can do with primer is to fill gaps and remove seam lines. Simply brush on sandable primer and then wait for it to dry. Once it’s dry, you may add another layer or sand down the area until you have a smooth surface. Then, spray a fine-grit primer so that you can see if anything needs to be corrected.
See also: Gunpla Seam Line Removal 101

Here is the seam that I want to remove. First I glued it together using Tamiya cement.

The cement wasn’t enough to seal the seam, so I added Tamiya Surfacer with a brush. Be sure to use an old brush for this task, because using this lacquer-based surfacer will damage brushes over time.

I put it on pretty thick because I am going to be sanding most of it away.

Here is the result after sanding it. Now let’s spray some primer and see how it looks.

Big improvement! I see a few places where I may need to sand and reprime, but I corrected the most noticeable seam on this piece.
3. Create a uniform surface for your color when kitbashing or painting a custom color scheme
See also: How To Spraypaint A Custom Paint Job For Gunpla
When kitbashing we often run into clashing mold colors that will affect the final color. By spraying down a consistent primer color we can make sure that the final colors will all have the same tone. Take a look at our article on primer colors for more information on how light and dark primer will affect the final color.
See also: Gunpla Primer 101
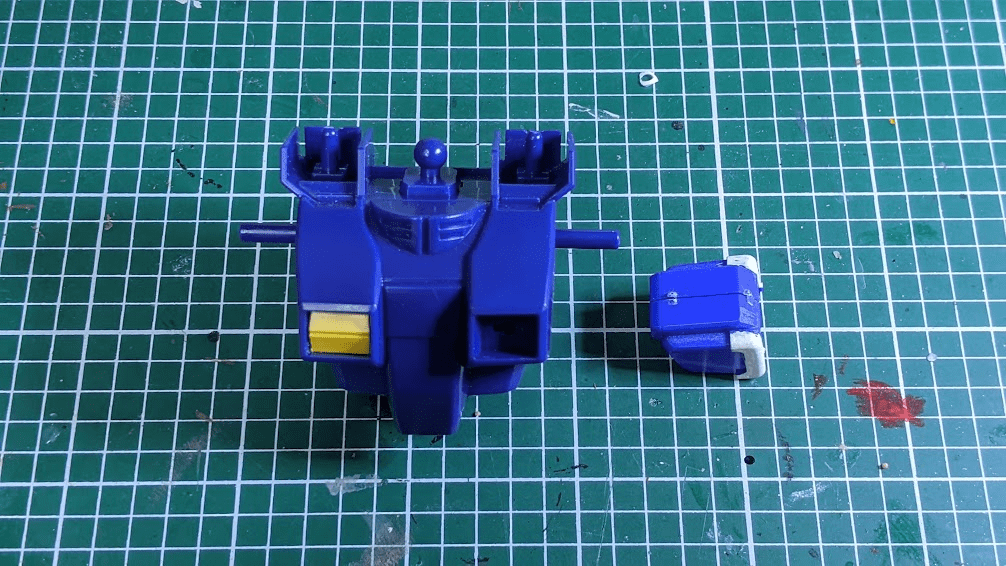
Here is an example of some unprimed parts. They are both molded in blue, but when you look closely, the one on the left is much darker—it’s almost purple. This would affect whatever paint I put on top and the parts would look mismatched. A primer would give me a consistent base color if I wanted to kit-bash these parts together.
4. Make a uniform surface for the finish when using resin and 3D-printed parts
When using pla plate, resin, and especially 3D-printed parts, there will be a difference in texture that can show through the paint. Primer can usually provide a solution, although depending on the quality of the 3D-printed part, you may need to do more sanding than usual. I think it’s definitely worth buying or printing higher-resolution parts when you can to save time.
See also: What Are Gunpla Conversion Kits? Conversion and Resin Kits 101
See also: Pla Plates For Gunpla Modeling 101


Out of all the 3D-printed parts I’ve worked with, this Apex Detailing piece is one of the best. The only issue is that the top has a high gloss and the sides show some artifacts from the printing process, making it uneven.

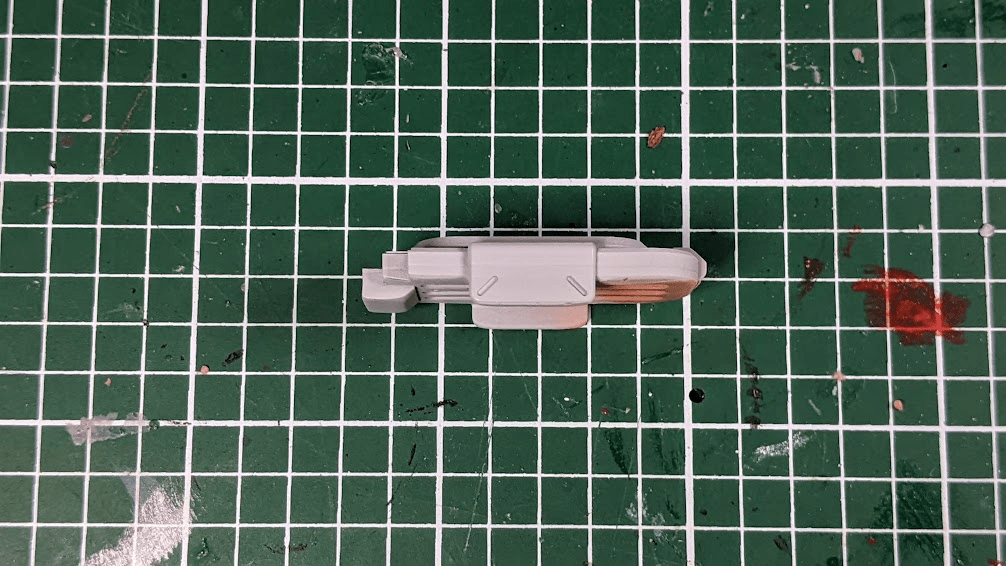
Another big improvement! I may come back with a brush and some Mr Surfacer 1000 to try and eliminate the lines on the side of the piece later on.
5. Create an anchor for water-based paint
As I mentioned previously, water-based paint just sits on the plastic without permeating it. However, if you put down a primer first, it will act as a mediator between the water-based paint and the plastic by biting into the plastic and creating a texture for the water-based paint to grip. Just be sure to let the primer cure before using a layer of water-based paint. If you use a water-based primer, you should still give it plenty of time to cure. The primary advantage of a water base is not having to deal with strong fumes.

6. Provide natural shading
If you use a dark primer and then layer up paint in the center of the piece, you will slowly create a natural shadow. This is similar to the Max Technique but it provides a darker, more subtle result. You can take this even further by adding incrementally lighter shades of paint until you have a nice gradient. You can also use similar methods to Zenithal Priming, or to use the Black and White Technique.
See also: How To Paint Gunpla With The ‘Black and White Technique’

You don’t want to over-prime your model and lose detail, so use the higher grits sparingly and only on really rough areas.
Choose the right tool for the job. My personal order of operations for a big repair job to a small repair job is putty > 1000 > 1200 > 1500. Depending on the situation, I will aim to use only one or two of those products so I don’t obscure detail on the model. So far, I haven’t run into a situation where I needed 500. I can usually get pretty decent results with putty, sanding, and then moving to a fine-grit surfacing primer.
There are some cases where you may want a rough texture, but most of the time you will want the finish to be consistent across the model. It’s always best to know the rules before you break them.
I haven’t had the chance to try out every primer, but I do prefer solvent-based primers when possible. I encourage you to try out different products and choose what’s best for you. I hope this will help you on your Gunpla journey and you can get the finish you have always wanted!
Megaplamo lives on the Gulf Coast of Alabama where he paints everything from Gunpla to vinyl garage kits. Megaplamo has been building model kits since the early 2000s and loves to share any and all information he has learned on his journey You can find Megaplamo on all social media as @megaplamo although he is the most active on Instagram.
Discover more from Gunpla 101
Subscribe to get the latest posts sent to your email.


