
Gradient painting is a technique in which one color gradually morphs into the next. It may look fancy, but it doesn’t have to be hard. Let Gunpla 101 contributor Scott—the one and the same behind the color-shift sandwich painting technique—show you his custom process for making airbrushing gradients on Gunpla models feel easy.
I’ve wanted to learn airbrushing since my Warhammer days, flipping through White Dwarf and marveling at those seamless blends. Back then, the cost kept it out of reach—and for years, life kept me away from painting altogether.
Fast‑forward to last year: a gifted Master Airbrush, a stubborn streak, and a Huckebein Mk‑III that became my first real test. It wasn’t pretty at first—I hit every beginner’s pitfall—but by the end, I’d laid down my first clean coats and felt that spark again.
Since then, I’ve been chasing a style that blends miniature‑painting “modulation” with the bold surfaces of Gunpla. This guide is my early roadmap: the paints and recipes I use, the techniques that work for me, and the reasoning behind each step so you can adapt them to your own builds.
The Gradient Trick for Minis and Gunpla
If you’ve painted miniatures before, you’ve probably used gradients to create smooth transitions between light and dark. In miniature painting, there’s a well‑established way to place those gradients for maximum impact: modulation shading. This technique positions shadows and highlights in deliberate zones to guide the viewer’s eye and make flat surfaces look dynamic.
It’s closely related to another miniature staple, non‑metallic metals (NMM), where you paint modulated gradients to mimic the way real metal reflects light—without using metallic paints at all.
I’ve taken these tried‑and‑true miniature techniques and adapted them to the larger, flatter planes of Gunpla models. The result is a repeatable, beginner‑friendly way to get eye‑catching gradient effects every time—whether you’re going for realistic shading, stylized anime flair, or even a neon synthwave glow. And you don’t need a high‑end airbrush to do it—everything here was done with my GHAD‑39 and a 0.35 mm needle, proving that technique matters far more than expensive hardware.
Plan Your Tones
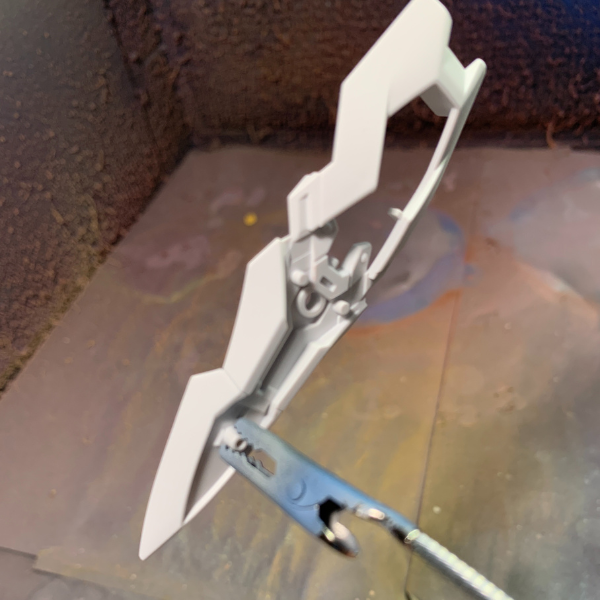
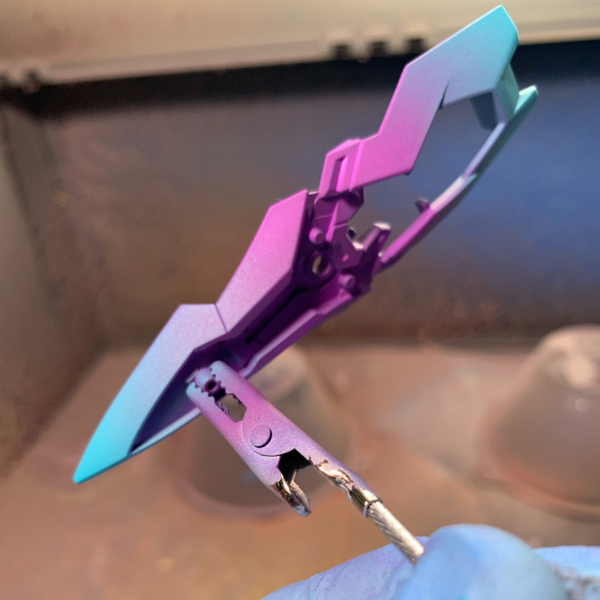
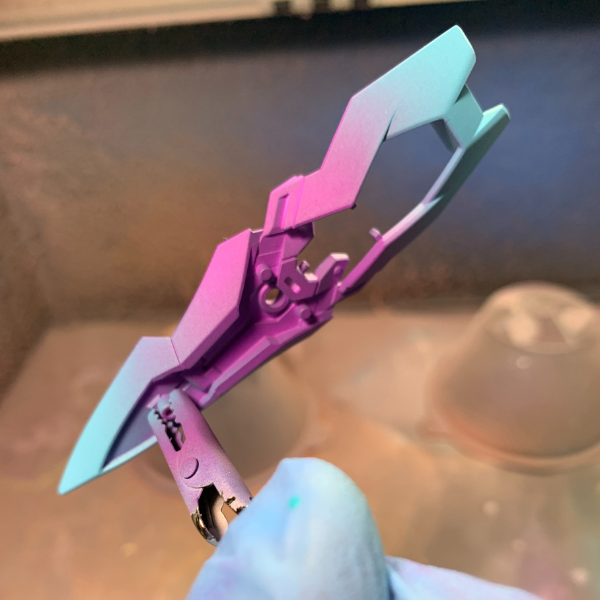
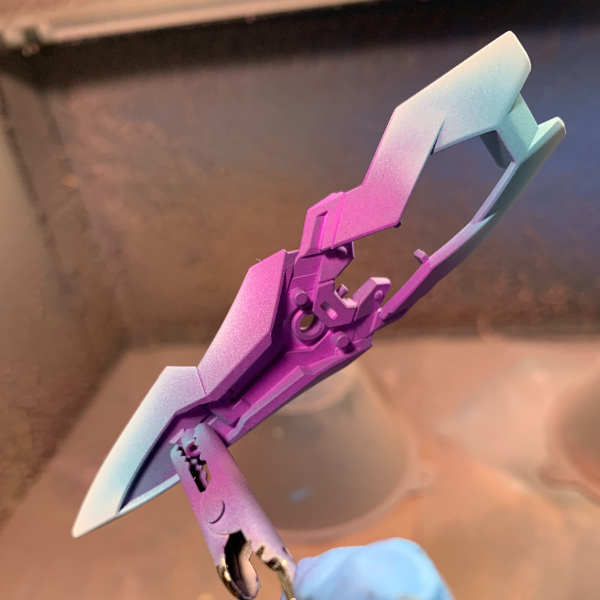
My first attempt was on the HG Weissritter. I divided each armor plate into three tonal zones:
- Basecoat (Shadow): Vallejo Pure Black / Vallejo Dark Prussian Blue for the deepest recesses. The Dark shadows anchor the part visually and make highlights pop.
- Mid‑Tone: Vallejo Mecha Color Titan Dark Blue / Vallejo Model Color Royal Blue for the main surfaces. This transitional color bridges shadow and highlight, keeping the gradient smooth.
- Highlight: Vallejo Mecha Color Light Grey / Vallejo Mecha Color Sky Blue for edges and bevels. Bright edges catch the light and define the shape.

Even if you’re confident, sketching or digitally mocking up your modulation pattern helps. Seeing it on paper first makes it easier to keep your shading consistent across the whole kit.
Control Your Spray
Before touching your kit, practice on plastic spoons. They mimic the curves and flats of armor plates, and you can mark them into tonal zones to rehearse your passes.

When you move to the kit:
- PSI & Distance: Keep air pressure steady and spray from slightly farther away to control coverage. This consistency prevents patchy gradients and overspray.
- Angle Control: Tilt parts away from the spray to limit where paint lands. This keeps shadows intact and prevents flooding highlights.
- Masking: Use tape for crisp edges or to protect areas from overspray. Sometimes a clean separation between tones makes the modulation effect stronger.
Mix With Purpose
Here are my go‑to 40 drop acrylic recipes:
- Basecoat & Mid‑Tone: 28 drops paint** + 10 drops thinner + 2 drops SlipMix*. The heavy thinning ratio gives you more working time and smoother fades.
- Highlight: 28 drops paint** + 2 drops thinner + 8 drops Aqua Gloss + 2 drops SlipMix*. Aqua Gloss thins the paint without dulling it, making highlights easier to layer and giving you a head start on clear coating.
*Note: SlipMix is a solution of 80% Vallejo Flow Improver and 20% Vallejo Retarder Medium.
**Note the Second: If your paint is pre-thinned, plan to increase your paint drops by 20% and decrease your thinner by 20%.
Troubleshoot as You Go
As you experiment with gradients, you might experience some common pitfalls. Here are their solutions:
- Tip Dry: Add a drop of retarder, wipe the needle or lower PSI. Removing and slowing paint drying at the needle keeps your spray smooth.
- Grainy Finish: Move closer or thin more. Paint drying mid‑air causes texture; adjusting fixes it.
- Overspray: Reduce PSI, change angle, or mask. Less air and better control keep paint where you want it.
- Patchy Gradients: Build in light passes. Gradual layering avoids harsh transitions.
Push the Effect
On my Wing Gundam Zero Ver. Synth, I used modulation for pure visual punch. I shaded toward the tips of each part, making sure no two highlights touched. This created a soft modulation effect.


Then I added a sharp neon highlight from tip to basecoat. The overlapping the glow across all tones creates a “lit from within” effect, especially under black light.
Growth Over Perfection
Modulation shading takes planning and practice, but it’s so worth it! With acrylics, mistakes aren’t permanent — a soak in isopropyl alcohol can reset the part. Even subtle shading can make a model stand out, and the skill ceiling is high enough to keep you experimenting for years.

Your first attempts won’t be perfect. They’re not supposed to be. Chase growth, not perfection. Every pass of the airbrush is a step forward, and every “mistake” is just another layer of experience.
Scott demystifies Gunpla customization with step-by-step guides and creative hacks. His mission is to foster a supportive community by sharing lessons learned from every build—mistakes and all. Read more on his blog, Mecha Assembly eXperience (M.A.X.), and join the conversation on Instagram and Facebook.
Discover more from Gunpla 101
Subscribe to get the latest posts sent to your email.


