
Panel lining is one of the fastest ways to make your Gunpla look sharper. A few drops of Tamiya’s Panel Line Accent Color can transform a plain kit into something mechanical and alive. It’s pre‑thinned enamel, flows beautifully into grooves, and gives beginners instant results.
But Tamiya’s palette is limited — black, brown, gray — and enamel carries risks if it seeps into stress points. So what if you want something bolder, safer, and more eye‑catching? That’s where fluorescent panel liners come in.
Why Fluorescents?
Companies like Stedi have released UV‑reactive liners that glow under blacklight. They’re fun, but they come with two downsides:
- Thin coverage: fluorescents often look faint in normal light.
- Availability: depending on where you live, they can be tough to find.
Instead of giving up on the idea, I accepted the challenge. And rather than just recreating what was already out there, I decided to level it up by borrowing a trick from miniature painters: laying down a white base first to make colors pop. That extra layer gave me the crisp definition I wanted in daylight, while the neon overlay delivered the glow under UV. In other words, the “problem” became the spark for a new approach — one that turns a niche product into a repeatable method any builder can try.

DIY Fluorescent Panel Liner Recipe
The base formula starts with a 1:1 mix of Vallejo Airbrush Thinner and 91% isopropyl alcohol. The thinner keeps the paint smooth and prevents clumping. The alcohol speeds up drying so the liner doesn’t pool. Together, they mimic the “snap” of a true panel liner.
From there, build in two stages:
Stage 1: White Base (40 drops total)
- 12 drops Golden High‑Flow Titanium White — strong opacity; this creates a crisp foundation so the neon has something to sit on.
- 14 drops Vallejo Flow Improver — slows drying just enough to keep the paint moving through grooves instead of drying in place.
- 6 drops Vallejo Glaze Medium — adds transparency and extends working time, which helps capillary action.
- 12 drops of the thinner/alcohol mix — thins everything to panel‑liner consistency.

Stage 2: Neon Overlay (40 drops total)
- 10 drops Golden High‑Flow Fluorescent Ink (your color of choice) — highly pigmented, so the glow stays vibrant even when thinned.
- 14 drops Flow Improver — same role as before: keeps the neon flowing smoothly.
- 4 drops Glaze Medium — gives the neon a little body so it sits on top of the white instead of sinking in.
- 12 drops of the thinner/alcohol mix — ensures consistency with the base layer.

Application & Timing
Apply just like a normal panel liner. Let sit for 20–30 minutes, then gently wick away the excess with a damp cotton swab. No mineral spirits needed — water cleanup works fine.
When moving to the neon layer, you’ve got options:
- Direct: wait another 30 minutes and apply the neon straight on top.
- Safer: apply a thin gloss coat first, then add the neon. This gives you a buffer if you’re worried about lifting the white.
Seal everything with a final gloss or topcoat once you’re happy with the look.
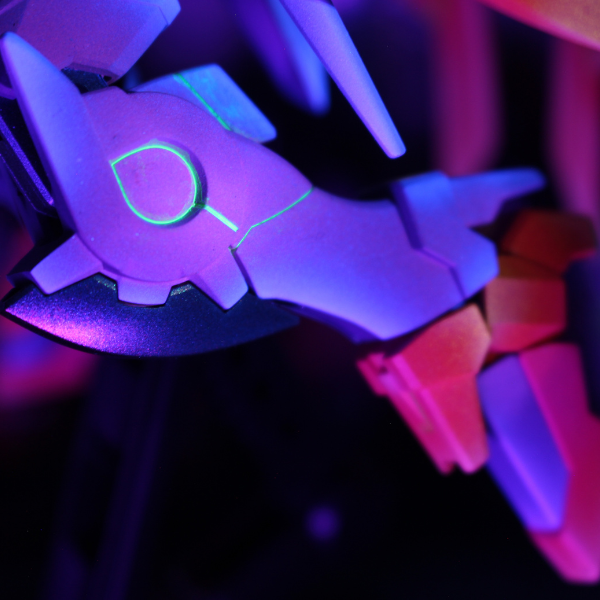
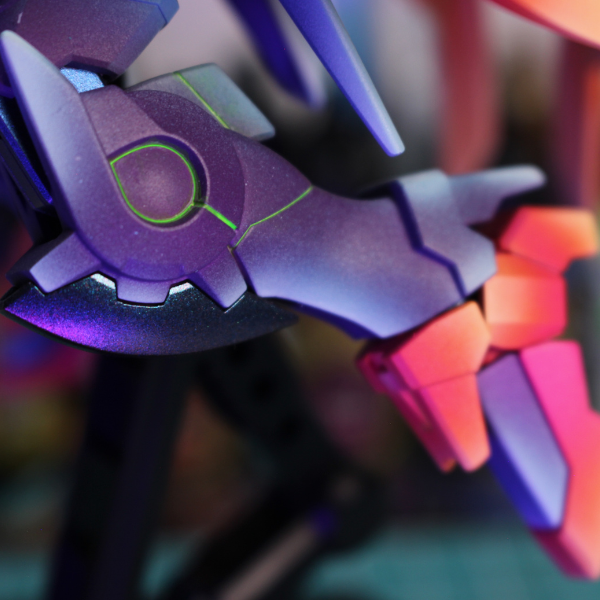
The Payoff
The result is lines that pop in daylight and glow under UV. It’s more work than cracking open a bottle of Tamiya, but the payoff is unique — especially under competition lights or display setups.


And beyond the glow, the process itself teaches you something bigger: how additives change behavior, how layering creates depth, and how experimenting builds confidence. That’s the real magic of Gunpla — every kit is a chance to learn, to try something new, and to make the model yours.
Scott demystifies Gunpla customization with step-by-step guides and creative hacks. His mission is to foster a supportive community by sharing lessons learned from every build—mistakes and all. Read more on his blog, Mecha Assembly eXperience (M.A.X.), and join the conversation on Instagram and Facebook.
Discover more from Gunpla 101
Subscribe to get the latest posts sent to your email.


