
Did you know Bandai Hobby has produced Gunpla kits since 1980? Vintage Gunpla are surprisingly cheap and easy to get your hands on. Our contributor, Joey, goes into the details.
Gunpla has come a long way since its debut in July, 1980. Modern Gunpla are colorful, extremely detailed, and well-engineered plastic kits that create figures with articulation rivaling even the best action figures.
However, Gunpla wasn’t always so complex. They started out simple, cheap, and single colored. They’re very different, to be sure, but still make fun kits to build especially if you’re curious about the changes that Gunpla has undergone over the years.
Let’s dive in and take a look at what to expect when you’re building a 1980s Gunpla.
Get your tools together

First, start with the same basic tools you’d use to build any Gunpla. A good pair of side cutters or nippers, a hobby knife with a fresh, sharp blade, and a set of files are a good start. The nippers should be sharp and the head should be narrow to fit between the parts and the runners without marring the part as you cut. The knife and the files are for removing those pesky nubs.

Next, you’ll need some additional tools on top of the usual set. Because old kits don’t snap together and are single-color molded plastic, you’ll need modeling cement (recommended) or super glue along with painting supplies. I would also pick up some sandpaper (600-1200 grit) or sanding sticks to clean up seam lines after cementing parts together.
Additionally, 1980s Gunpla isn’t molded in all the fancy colors of modern Gunpla, so you’ll want to break out some markers, brushes, paints, and thinners to make these kits look their best. Since these are some of the cheapest Gunpla kits there are, it’s fun to practice and try interesting color schemes without the risk!
What’s in the box?

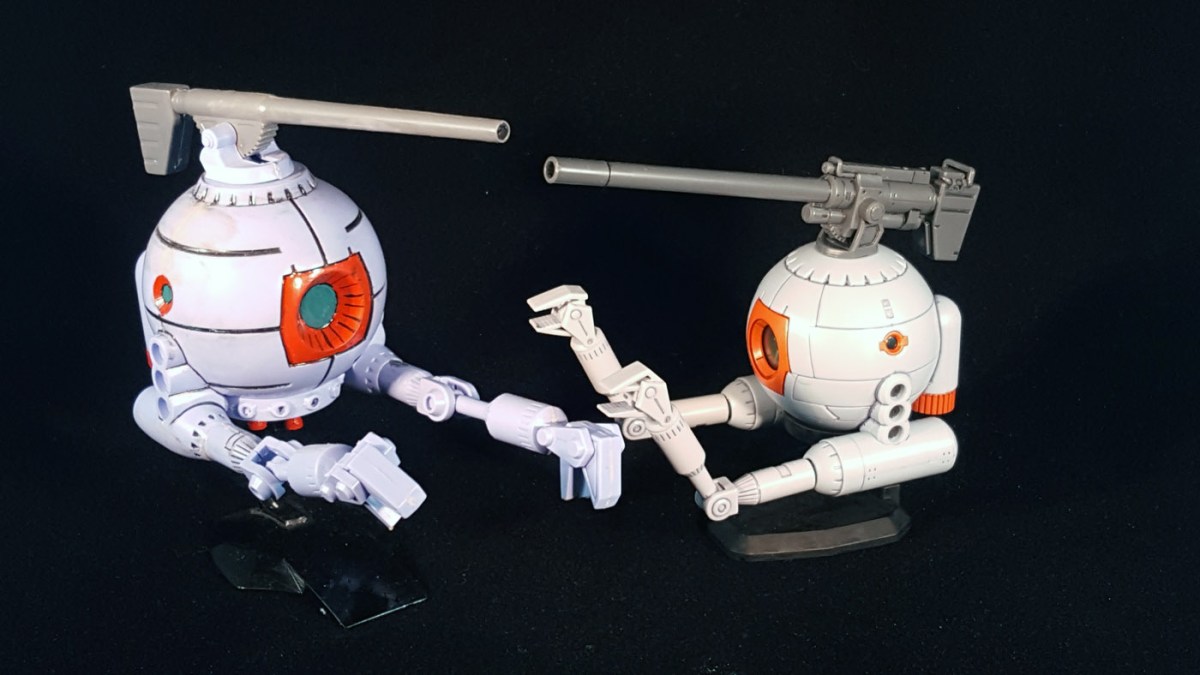
For this example, I built the Federation’s most humble unit: the Ball. Taking a look at the kit, inside you’ll find two half-runners in a single bag as well as a single sheet of instructions. This kit is unique in that you get a 1/144 scale Ball as well as a 1/250 scale Ball. It seems that Bandai has always sold the Ball in pairs when it comes to the smaller scale, as the modern HGUC Ball comes in a twin pack as well.
One side of the manual features pictures of a fully painted set of runners, promo shots of the completed kit, and the first step to assemble your Gunpla. These old manuals are pretty well detailed, but as you can see, they are entirely in Japanese. Full English instructions weren’t introduced until 2016.
That being said, the images in the manual are crisp and easy to follow. You can tell Bandai put a lot of work into their manuals even from the beginning of Gunpla.

The parts are crisply molded even on this older kit. However, as you can see, there is a bit of flash around the edges of some parts which will need to be trimmed or sanded away. (Flash is the extra bit of plastic that leaks out of the mold when the runners are molded.)
The Build
Except for the fact that you attach parts with glue instead of snapping them together, the assembly process isn’t too different from a modern Gunpla. Clipping the parts from the trees and trimming the nubs is standard fare for any model kit, so I won’t cover that here.

Let’s skip to the glue step. First, apply a small amount of glue to the side of each part, then hold them in place while the plastic cement dries. Follow the directions for you particular brand of cement for drying times. I like to give my kits at least a few hours to fully cure. To hold the parts together, you can use rubber bands or you can steal someone’s hair tie like I did. Once its dry, if there’s any excess glue at the seam line, you can sand it down with some sandpaper. Now it’s ready to paint.
Final Thoughts
These old diamonds in the rough may not have the fancy colors, seamless connection, or articulation of their modern counterparts, but they are a fun change of pace. Many of the old 1980s kits are blank slates, ready to be detailed and customized without running the risk of ruining a more expensive model kit. The 1/144 GM and 1/144 Ball kits shown here run about ¥300 to ¥400 ($2.50 to $3.50 at the time of publication), which is really easy on the wallet! Older kits are fantastic testbeds to learn new techniques, practice seam removal, and perfect your painting.
So what do you think? Will you be buying any older Gunpla for your collection?
I’m Joey Gunota and I’ve been collecting and building Gunpla since 2000. I’ve built about 450 Gunpla and have just about as many in my backlog. I just love collecting and snapping up all kinds of kits. Follow me on Twitter @JoesGunpla, check out my quiet-for-now YouTube Channel, and listen to the podcast I co-host with my friend George called The Half Hour Nerd (warning: strong language) where we talk about all kinds of nerdy things, including Gundam and Gunpla and a bunch of other nerdy topics!
Discover more from Gunpla 101
Subscribe to get the latest posts sent to your email.


1 Comment.
Ah yes, these are the old ones. I like building kits like these for the novelty they posses. Neat little kits from a time in the past with interesting molding.
https://uploads.disquscdn.com/images/26969a25edbc6d6afbbdb319c91572fc5986d261b65243bbcb930040fb96502c.jpg https://uploads.disquscdn.com/images/0f031db024e3f9e85a1f90104c887c3bbe090679d1cc71526128f500e8e660a1.jpg