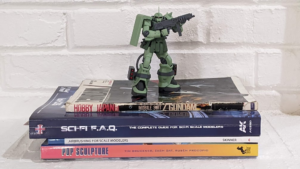
Ask Gunpla 101 is our advice column in which we take questions and share them for our readers. Do you have any questions for Gunpla 101? Be sure to contact us by using our form or emailing us at [email protected].
It “spoke” to me—the Gundam Fenice Rinascita Master Grade. I have modeling experience though it’s been 25 years. I opened this thing up and WOW I’m feeling very overwhelmed. Any tips on how to start? — Mike
Hi Mike,
Congratulations on buying your first model in 25 years! The Fenice Rinascita is a truly unique-looking model, and I’m sure you’ll love it.
It might be a little overwhelming how many trays/sprues of parts come with the kit, especially when it comes to a complicated Master Grade. The best way to beat overwhelm is to just do a little at a time. Most kits begin with the head, then move on to the torso, the arms, the pelvis, the legs, and finally the weapons. When you’re looking at just one piece of the kit at a time, it’s a lot easier to stay calm.
Take a deep breath, open up the instructions, and take out only the sprues that are addressed in the first 3 steps. Then, take out only the ones in the next 5. When you’re looking at just a few parts at a time, it’ll be a breeze! Good luck.
Best, Lauren
First off i just wanted to say I love your website. I have been doing Gunpla since 2012 since i picked up The Strike at Otakon and i have to say your site has helped me greatly in building better models.
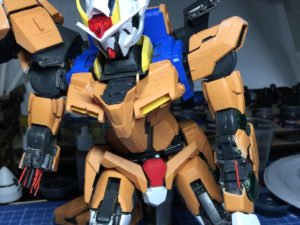
Having said that I have a question. I recently purchased an Origin RX-78-2. I finished assembling the head and chest units. I then began the arms and I somehow got a piece in backwards. Upon realizing this I tried to CAREFULLY remove the piece but it is stuck tight and i do not want to break and vitals.
My question: Have you ever had this happen in your Gunpla experience? If so then what have you done to correct the problem? Looking forward to hearing from you. — A.J.
Hi A.J.,
Usually when this happens to me (Lauren), I ask John to pull it out because he’s stronger. That’s right, we use as much force as necessary to get a stuck piece out of another piece! It’s plastic, it’s tough. And they really do get wedged in there.
We recommend using something you can stick between the part and the thing it is stuck inside. Like a toothpick or the side of your tweezers. Then rock it back and forth while wriggling the piece out. Be forceful, but slow.
Let us know how it works out!
Best, Lauren
Do you have any tips for weathering and battle damage? I’m working on a TR1 Hazel Custom HGUC 1/144 kit. It was. My first kit and my wife & I just moved. It got a bit damaged in the move and weathering was the first thing to pop into my mind…
Also what kind of weathering would be good for a mobile suite that is known to fight mainly in space? — Jared
Jared, thanks so much for writing. Congrats on your first kit! And what a good idea to make lemonade out of lemons with weathering.
Our weathering tutorial is here. We haven’t done a battle damage tutorial yet, but we’ve found this one from Hobbylink TV to be very helpful.
I also like this one from From Japan Blog that explores dry brushing in order to create realistic battle damage on your Gunpla.
For a suit that fights mainly in space, you’ll probably want Tamiya Weathering Master F – titanium, gunmetal, and copper. I’ve never been to space, but I bet these metallics would really make sense.
Best, Lauren
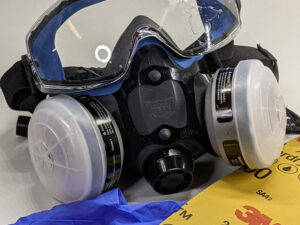
Hi, I was wondering if you have any thoughts/concerns/recommendations on using a dremel (or something like it) while building gundam. I see everyone saying to use a file or sandpaper, but haven’t seen anyone use a dremel. — Sebastian
Sebastian, great question. I had asked myself this once when I was debating whether to get my own dremel for sanding and drilling weathering damage into my Gunpla kits. Now that I have one, I can tell you there are pros and cons for using a dremel.
If you’re going to use a dremel for sanding, you will need a specific type so that you can get the best sanding experience without removing more than what you wanted. You will need a dremel that has speed control, like this one—one that has multiple speeds beyond just slow and fast. If you’re using a cheaper dremel with just a slow speed and a fast speed, the faster speed may help speed up sanding but gives you little to no control how much can be taken off of the plastic when you do this. Sure you might have a very smooth surface, but you will also have dips and lost plastic on the part which would require fixing up. If you’re going to use a dremel for sanding, start with small parts, (unless you find the right-sized polisher for your bigger parts), and take it slow.
Now the other uses of dremels is for battle damage, wear and tear, and kit modifications. While you can achieve the same effect if not slightly better with a soldering tool, dremels leave a unique impressionable mark on your kits that you can appreciate. If you’re going to cut off chunks on parts, like a shield, you can use the faster settings. If you’re engraving markings, or doing cuts in armor from sword slashes, or bullet holes, use the slower settings. This gives it a more realistic look, and gives you more control on how you want to cut. Good luck!
Best, Nanochi
Soon I will be embarking on my first painted build. I’ve been testing a few hardware spray paints and it’s coming out meh. Some people say its because its just normal spray paint that it comes out looking like a cheap toy. Is there really that much of a difference between normal spray paints and hobby ones? — Felipe
Hello Felipe, glad to see your ready to go on with your first painted build. I’m going to talk about a few advanced techniques for your question that I think will be really helpful to you even from your very first time painting.
You can use most any paint on your kits with the right prep, but hobby paints do tend to have a better “settling” they’re dry. “Settling” is what we call it when the paint evens out due to gravity. More hobby paints naturally settle without having to add more paint thinner or water (depending on the brand) than with hardware paint. It’s best to test the paint you want to use on plastic spoons because they’re cheap.
I have not seen much difference in spray paints, but I have seen a major difference in paint quality depending on how the builder preps their kit. The best practice for your kits is to use a good thin layer or primer, typically white or gray primer, on your parts. The primer not only removes nub and sanding marks, but it will also help the paint adhere to the surface better as well as leading to more advanced techniques like pre-shadowing, multicolor layers, metal layers, etc.
For priming a kit, (and eventually, spray painting) you can follow the same steps as when you apply top coat. But, you will want to break down the kit as much as possible and when putting the parts on sticks, to put the clips on parts that will not be seen on the kit once put together (like the joints that go into the shoulders, or the waist, etc). Make sure your layer is thin enough to cover the part but not to cover the detail. The best way is to have as thin a coat to where you see a partial amount of the original plastic color, but the primer is showing up more. This is something that takes experience on a few throw away kits before you find your groove that works for you. With your primer this will make your colors stand out more and help prevent them from looking like a cheap toy. If however it still looks a bit cheap, matte top coat spray will help as well, though the matte top coat should be the last step after decals and after panel lines and any weathering or damage you do.
I hope this helps out. Good luck on this!
Best, Nanochi
Photo credit: Danny Kim